Shopping Cart
There are no more items in your cart


Available

Makeup isn't just a routine—it's a way of expression, creation, and enhancing your natural beauty. Especially if you're just starting out, you might feel like there are "rules" or secrets that everyone knows except you. In reality, all you need is guidance, methodology, and small steps that make a huge difference. At HairMaker.Gr, we see people every day at our barbershop and beauty space asking for simple, practical solutions to improve their makeup results.
In this premium guide, we've gathered 12 proven secrets that have changed the experience of thousands of beginners. With simple techniques, clear instructions, and tips you can apply immediately, you'll learn how to enhance every feature of your face—from your eyes to your lips and eyebrows. Whether you're taking your first steps or want to improve how you apply products, this article is your ideal companion. ✨
If there's one trick we often recommend to makeup beginners, it's the "plastic spoon." It might sound funny, but it's one of the most effective and practical tips someone can use when starting to apply mascara. The curve of the spoon acts as a shield between the lashes and the under-eye area, preventing unwanted smudges that can ruin your entire look.
Often, people who struggle with mascara end up wiping the lower lid repeatedly, inadvertently removing concealer or foundation as well, resulting in ruined makeup. The spoon helps create a stable support point, allowing you to pass the brush confidently, especially if you still have an unsteady hand.
Another advantage is that it helps "lift" the lashes. By gently pressing the spoon at the base of the lash and applying mascara, you create a small curl that gives a more intense look without an eyelash curler. Ideal for anyone who wants a natural yet impressive result.
✨ Small professional tip: If you use the spoon on the upper lid as well, you can avoid marks left when the brush accidentally touches the skin. We see this daily at the barbershop and makeup studio—it always works. It's a small "secret" that makes a huge difference in the confidence of those just starting out.
The biggest gain, however, isn't just the clean result. It's the familiarity. After using the spoon for a few weeks, you'll notice your hand gains stability and eventually you won't need it anymore. Until then, though, it's one of the smartest hacks for beginners.
One of the biggest secrets in successful makeup is understanding your face shape. Especially when it comes to blush, correct placement can enhance your features in a way that looks natural, elegant, and perfectly suited to your facial structure.
Blush isn't just a touch of color—it can visually change your face shape. For example, on round faces it's applied higher and upward for a more lifted appearance, while on square faces it works better when placed more centrally to soften angles. On oval faces, application is simpler, as most techniques work.
This is a point where we see tremendous difference: when clients understand their face shape, their results immediately look more "customized" and natural. It no longer looks like something simply placed on the skin, but like a smooth shade that ties into the overall image.
Another mistake beginners make is using excessive amounts. Blush is beautiful when it looks like a healthy glow of the skin, not like a stain. The best technique is to apply a little product to the brush and build color gradually. Good blush in the right amount can truly transform the face without looking intense.
Important point: choose the right tone. Cool tones for cool undertones, warm tones for warm ones. The right blush color makes skin appear more vibrant and healthy. If you're a beginner, stick to neutral colors until you see what suits you.
✔️ Final tip: "Blush is the product that brings life to the face. It just needs to be in the right place." Often, diagnosing correct placement is what's missing, not the product.
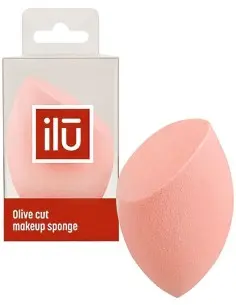
Small selection, big results ✔️
One of the most useful aids for makeup beginners is eye tape. It might seem like a "trick" used only by influencers, but in reality it's a professional tool makeup artists have been using for decades. The tape functions as a guide to create clean lines in both eyeliner and eyeshadow, especially when you want to achieve a bolder, lifted appearance in the eyes, like the popular Cat Eye.
Using it is simple. Stick a small piece of tape under the outer corner of the eye angling upward, following the natural line of the lower lid. This way you'll have a "ruler" that helps you stay on track as you draw the eyeliner line. This is particularly practical for beginners who don't yet have a steady hand or who struggle to maintain symmetry between both eyes.
When we do makeup for events or photoshoots, we often use the tape trick, not only for eyeliner but also for eyeshadow. Especially in smoky looks, the tape helps prevent shadows from spreading too much, while simultaneously shaping a cleaner and more impressive outer corner. The result always looks more professional, even with little effort.
Another detail beginners love is that the tape functions as a "reference point." If you're not sure exactly where to lift the eye, the tape shows you the right direction. After application, you simply remove the tape gently and a clean, sharp line is revealed.
✔️ Mini tip: If you have sensitive skin, stick the tape on your hand first to reduce the adhesive's intensity. This way it won't pull the skin when you remove it.
Eye tape is an excellent example of how a simple, affordable tool can upgrade your makeup. For many beginners it's a turning point—from confusion and insecurity to a point where they know exactly where to place the product and how to achieve a clean, symmetrical result.
Eye highlight is one of the most underrated makeup steps, especially by those just starting out. In reality, correct placement of a light color can completely change the appearance of your eyes—make them look bigger, brighter, more rested, and more "open."
Highlight is traditionally placed in three spots: ✔️ in the inner corner of the eye, ✔️ in the center of the lid, ✔️ and under the brow arch. These three points create a natural light "reflection" that gives the gaze more vibrancy.
In practice, we often see beginners using very dark colors without any light to balance the result. This makes the eye look "heavy." Conversely, applying highlight before shadows helps define the eye structure. The eye immediately looks clearer and more three-dimensional.
The technique we teach at HairMania Greece is simple: – In the inner corner, use a light champagne or pearl tone. – In the center of the lid, a slightly warmer, luminous shade. – Under the brow, something neutral and subtle. This trio always works, regardless of skin tone.
✨ Pro Tip: If you want the eye to appear larger, place the highlight slightly higher than the center of the lid. The result is a more "lifted" visual, ideal for tired eyes.
For beginners who fear overdoing it, there's a rule: "A little light is better than none." A subtle highlight can save a heavy smoky look and turn it into something more balanced. Without it, makeup often looks flat and monotonous.
Finally, highlight is one of the products where quality matters dramatically. Good pigment will give brightness without leaving white ash or chunks. It's a small investment that truly pays off.
Many beginners focus on eyeshadow colors, but what really makes the difference is placement. How you place shadows can completely change your eye structure—it can make it appear taller, more open, narrower, or more "lifted."
The first step is understanding your own eye shape. The most common are: almond, hooded, monolid, downturned, round, and deep-set. Each has its own peculiarities. For example, with hooded eyes the correct technique is to place the main shadow slightly above the natural crease to create the illusion of more space.
One of the most common mistakes we see is placing very dark tones low on the lid. This closes the eye and gives a "heavy" result. Conversely, gradual blending from light to medium and then to darker tones outward gives natural depth and symmetry.
✔️ Mini tip: For beginners, placing the darkest shadow in a "V" shape at the outer corner is almost always a safe solution. It gives lift and clean contour to the eye without excess.
Once you learn how your eye "behaves," you'll stop mimicking tutorials and start creating looks that truly suit your own structure.
If there's one product that can radically change the appearance of eyes without any technical difficulty, it's the nude pencil on the inner waterline. Most beginners use black or brown eyeliner on the waterline, which often makes the eye appear smaller. Nude, conversely, "opens" the gaze and creates the illusion of larger and brighter eyes.
The technique is simple: gently apply the pencil on the lower inner waterline and avoid very white pencils, which can look unnatural. Nude has a natural transition with the eye color and suits almost all skin tones, especially lighter ones.
The nude pencil is one of our most frequent recommendations to beginner clients. It's an easy way to achieve clarity in the gaze without complex techniques. It also helps wonderfully in looks that need freshness: morning makeup, office makeup, or simply days when you want to look rested without intense effort.
✔️ Pro tip: "For an even brighter result, combine the nude pencil with a subtle highlight in the inner corner." The result is fresh, youthful, and suits everyone.
Finally, a mistake many beginners make is trying to replace the nude pencil with concealer. This not only doesn't "sit" properly in the wet area of the eye, but can also cause irritation. Choose a real eye pencil, preferably soft and creamy.
The right base is half the result ✔️
Primer – Skin Preparation
Helps smooth pores, gives longevity and stability to makeup.
Bronzer – Warms the Skin
Adds color, dimension, and beautifies the face contour.
Powder – Stabilization
Stabilizes makeup and reduces shine, ideal for beginners.
Blush – Natural Glow
Brings vibrancy to the face and ideally complements foundation.

Subscribe to our newsletter and discover beauty secrets, makeup tips, premium products, and techniques we practice daily at HairMania Greece.
No spam — only value.

Giannis – Owner of HairMania Greece & Founder of HairMaker.Gr
Professional hairdresser with 25 years of experience in men's and women's grooming. I started HairMania Greece with the goal of bringing premium products and substantial knowledge to the public—tested daily at the barbershop. ✔️
At HairMaker.Gr I share real experiences, application techniques, and advice that start from professional daily practice at the salon and are transferred directly to blog guides.
For questions about hair, makeup, or grooming, you can send email to info@hairmaker.gr .
Follow us:
@hairmakergr | @hairmaniagr


Comments (0)