Shopping Cart
There are no more items in your cart


Available
Cleaning a safety razor is not just a routine task – it’s an essential part of your grooming regimen if you want top performance and long-term durability from your tool. Over time, soap residue, hair, and moisture build up on the head and blades, reducing efficiency and increasing the risk of skin irritation.
Proper razor maintenance ensures a clean, smooth cut, reduces friction, and prolongs the lifespan of the blades. It also prevents oxidation and rust, especially if you store your razor in humid areas. Regular care also minimises bacterial growth, contributing to a more hygienic shave.
The cleaning process doesn’t require specialised tools — a cleaning brush, lukewarm water, and mild soap are enough to effectively remove residue. A well-maintained blade also glides more easily across the skin, reducing the need for multiple passes and minimising nicks.
Think of cleaning as an investment: a well-maintained razor preserves the traditional shaving experience, offering an unmatched result every time. In the following steps, we’ll look at how to prepare the materials, safely disassemble your razor, and clean each component in the most effective way.
Before you start cleaning, it’s important to gather all the necessary razor cleaning tools and the right materials. This not only makes the process faster and more efficient but also reduces the risk of damaging the delicate parts of your razor.
Start with a good cleaning brush to help remove hair and soap residue from the blades and the head. A microfiber cloth is ideal for wiping down metal parts without leaving lint or causing scratches. For deep cleaning, get some mild soap or a specialised metal cleaner to remove stains and grease.
Using isopropyl alcohol in small amounts can disinfect the blades, while a small bowl of water and lukewarm water will help you rinse the parts. It’s also a good idea to have blade lubricant to ensure smooth operation and protect the metal from oxidation.
Don’t forget surface protection, such as a small towel or kitchen paper, to avoid damaging your countertop. Proper preparation and using quality cleaning materials will save you time and ensure that your safety razor stays in excellent condition for many years.
Proper razor disassembly is the first and most important step to clean it effectively without causing any damage. Before you begin, make sure the razor is completely dry and that you are working on a safe, clean surface with good lighting.
Start by removing the blades. Hold the razor by the handle and carefully unscrew the safety head. If your razor has a three-piece system, you’ll see that the head consists of the top cap, the base plate, and the blade. Place each part in a separate spot to avoid confusion or damage.
Next, check the parts for any signs of wear or soap residue. The component separation process should be done slowly and without rushing. If you notice that any part is hard to remove, do not use excessive force — follow the manufacturer’s instructions for safe disassembly.
Once disassembly is complete, place all the pieces on a small towel or kitchen paper. This protects the metal parts from scratches and allows you to keep all components in view before starting the cleaning process. Paying attention to order and detail will make the next cleaning steps easier and more efficient.
Proper blade cleaning is crucial for both the performance and the longevity of your razor. Start by rinsing the blades under lukewarm water to remove soap residue and hair. Avoid hot water, as it may weaken the metal over time.
For a deeper clean, use a mild metal cleaner or diluted soap. With a soft toothbrush, gently scrub the surface of the blade and the razor head. Rust removal can be done with a specialised solution — apply it carefully to avoid damaging polished surfaces.
Blade disinfection is equally important, especially if you shave daily. A few drops of isopropyl alcohol can kill germs and speed up drying. For razor head cleaning, remove any trapped residue and check that the grooves are clear to ensure smooth flow during shaving.
Once cleaning is complete, fully dry all parts with a microfiber cloth. A dry, clean set of blades and a head not only improve your shaving experience but also protect your razor from future wear and corrosion. Consistency in this process will reward you with a flawless shave every time.
✨ Try these specialised cleaners for safety razors:
After cleaning, proper razor drying is essential to prevent oxidation and damage to the metal parts. Start by removing excess moisture with a clean microfiber towel, which won’t leave lint or scratch the surface.
Let the components air dry naturally in a well-ventilated space, away from direct sunlight or heat sources that could warp materials. Storing in a dry place is the next step — avoid bathrooms with excessive humidity, as it can accelerate corrosion.
Blade lubrication is equally important for smooth operation. Use a few drops of special razor oil and gently apply it to the blades and moving parts. This reduces friction, protects surfaces, and ensures your razor cuts evenly without pulling hairs.
Regular oil application also helps protect blades from oxidation and keeps mechanical performance at its highest level. This way, you not only extend the life of your safety razor but also enjoy a consistently comfortable shaving experience for many years.
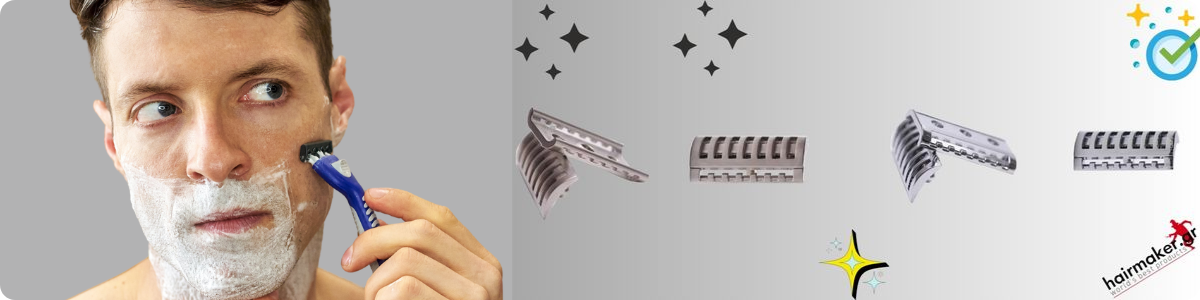
What it is: The head opens with “doors” for quick blade changes.
Advantages: Fast blade swap, fewer parts, beginner-friendly.
Disadvantages: More delicate mechanism, requires thorough drying at the hinge.
Cleaning/Maintenance: Open the “doors” and rinse thoroughly. Apply 1–2 drops of oil at the hinge after drying.
Ideal for: Those who want speed and ease in blade changes.
What it is: Handle, top cap, and base plate (3 parts).
Advantages: Simple, sturdy design, easy deep cleaning, long lifespan.
Disadvantages: Slower blade changes, more parts to disassemble/reassemble.
Cleaning/Maintenance: Disassemble, wash in lukewarm water with mild soap, dry each part carefully. Oil the threading.
Ideal for: Those who want “tank-like” durability and minimal mechanical upkeep.
Blade change speed
Butterfly: ★★★★★ • Three-piece: ★★☆☆☆
Ease of deep cleaning
Butterfly: ★★★☆☆ • Three-piece: ★★★★★
Following a few simple but effective razor maintenance tips can make the difference between an average shave and an excellent one. Start with cleaning after every use. Removing soap and hair residue maintains performance and prevents bacteria build-up.
Replace blades regularly depending on your shaving frequency. Dull blades increase friction, cause irritation, and reduce comfort. A good benchmark is every 5–7 shaves, but this can vary depending on hair type.
Proper storage is equally important. Keep the razor in a dry, well-ventilated place away from humidity. Use a protective case to avoid scratches and dents, especially when travelling. Regularly inspect for wear so you can fix any issues early.
Finally, remember that daily care and consistency in good maintenance practices not only give you a better shave but also keep your razor performing steadily for years. This way, you save money on unnecessary replacements and always enjoy a comfortable, flawless result.
“With the right cleaning and lubrication instructions, shaving became more comfortable than ever. Zero irritation and the razor now glides perfectly. ✅”
“The butterfly vs three-piece comparison helped me choose what suits me best. I bought a 3-piece and cleaning is a breeze. ✨”
To keep your safety razor in top condition, it’s helpful to follow a few practical steps that don’t require much time. These tips complement regular cleaning and focus on quick actions you can apply immediately.
These small actions help maintain performance, minimise wear, and extend your razor’s life without unnecessary effort.

Giannis – HairMania Greece Owner & Founder of HairMaker.Gr
Professional hairstylist for men & women. Owner of HairMania Greece and founder of HairMaker.Gr.
Our team at HairMaker.Gr shares articles based on real tests, client feedback, and daily salon experience to help you get better, proven results.
Questions or need personalized help? Email us at info@hairmaker.gr — we’ll be happy to assist!
Learn more about us on the HairMaker.Gr About page
Follow us on Instagram:
@hairmakergr – Official HairMaker.Gr Instagram
@hairmaniagr – HairMania Greece salon Instagram
Find us on:
YouTube Channel
Pinterest Page
Facebook Page

Subscribe to our newsletter and receive grooming tips, new arrivals, and exclusive offers straight to your inbox.
Only benefits. No nonsense.


Comments (0)