Shopping Cart
There are no more items in your cart

Available
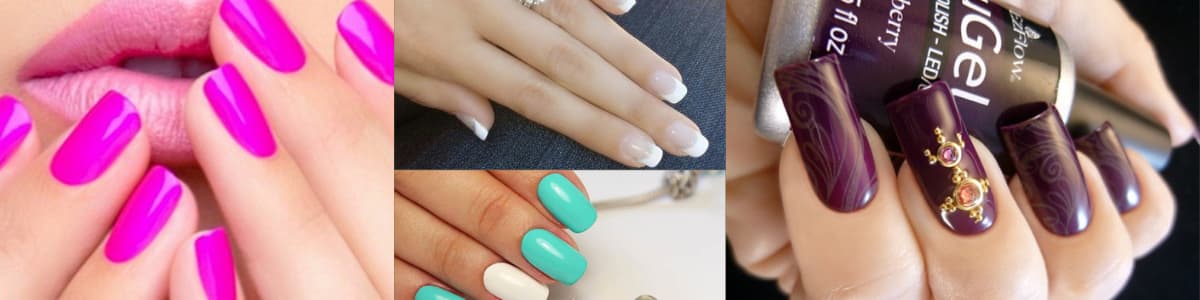
More and more women are choosing semi-permanent manicures for their durability and flawless look.
To get a semi-permanent manicure, the basic requirement is to visit a nail technician — unless you have your own UV or LED lamp at home.
Before you decide, it’s a good idea to know a few essential tips that many people overlook. Here are the most important ones:
The gel manicure is one of the most popular choices for those who want strong, long-lasting, and elegant nails. It’s a method that not only allows long-term color but also strengthens and even extends the nails using the appropriate materials. It’s especially loved by those with weak or brittle nails, as it provides a harder "shield" that protects against breaking or peeling.
The basic procedure involves applying special gel in layers, which are then cured (hardened) under a UV or LED lamp. This curing process is essential for setting the material and creating that characteristic glossy finish. The process typically takes 45–60 minutes, depending on the technician’s experience and the client’s needs.
The result can stay flawless for 3 to 4 weeks without losing its shine or peeling, making it ideal for anyone who doesn't have time for frequent salon visits. It’s also a great option for those with active routines that involve typing, housework, or exposure to cleaning products.
Gel also offers huge flexibility in design and effects. From plain single-color finishes to intricate nail art with glitter, stones, or graphic patterns — it all becomes possible with the right technique and creativity. That’s why gel has become a true fashion accessory and a means of self-expression.
However, it’s important to note that proper nail preparation is crucial: cleaning, dehydrating, and using a base coat all contribute to a successful application. Avoid removing the gel by picking or aggressively filing, as this can damage the natural nail surface. Removal should be done with proper products or by a professional.
Lastly, gel manicures are an excellent solution for those dealing with nail-biting, as they create a protective layer that helps support healthy growth. With correct application and regular maintenance, you can enjoy professional-looking nails for many days — stress-free.
Gel manicures have become one of the most loved nail treatments for millions of women worldwide. Why? Because their advantages go far beyond those of traditional methods. It’s not just about a technique that delivers stunning results, but a complete experience that offers durability, beauty, and versatility.
Beyond aesthetics and durability, gel also wins in terms of practicality. Busy women prefer it because it requires little maintenance. Hands always look groomed without the constant need for fixes.
Additionally, gel can be applied on various nail lengths and shapes — ideal for both natural and dramatic styles. The ability to extend nails using forms or tips gives even more flexibility to the final result.
All in all, gel is a complete solution for anyone who wants nails that stand out — without compromising on strength or day-to-day functionality. With the right application and quality products, its benefits are clear and long-lasting.
While gel manicures offer impressive results and great durability, they do come with some limitations. Being informed about the potential drawbacks is essential so you can make the right choice and avoid problems in the long run.
It’s important to apply gel only on healthy nails and always follow the proper preparation steps — including primer and base coat. If you experience irritation or sensitivity, it’s best to stop using gel and consider treatments or strengthening products.
Also, maintenance is essential. Every 3–4 weeks, you’ll need to refresh or refill the gel — either at a salon or, if experienced, at home using the right tools. This adds time and cost you should plan for.
That said, most drawbacks can be managed with proper application, occasional breaks, and professional-grade products. If you treat gel nails as a beauty method with responsibility and moderation, the benefits will easily outweigh the downsides.
Want to save time and money while still having great-looking nails? Doing your own semi-permanent manicure at home is a fantastic option. With a bit of practice, the right materials, and a little patience, you can achieve salon-worthy results from the comfort of your home.
Here are the essential steps for successful application at home:
Make sure your brushes stay clean, avoid dusty or humid environments, and check that your lamp is functioning correctly. Also, don’t touch the nail surface during the process — natural oils from your skin can cause lifting.
With a bit of care and patience, doing your own semi-permanent nails can become your favorite beauty routine. Remember: less is more! Use thin layers and don’t aim for perfection on your first try — experience comes with time.
Semi-permanent manicures may seem simple in theory, but there are several common mistakes that can make the difference between a professional-looking finish and a disappointing result. Even if you have experience, it’s easy to overlook small details that affect durability, appearance, and nail health.
Other mistakes include using a low-quality lamp, not following the curing times precisely, or applying gel over damp or oily nails. These all increase the risk of failure and surface damage.
Avoiding these mistakes is easier than it seems. Invest in good-quality products, read instructions, and follow each step without rushing. You'll be rewarded with longer-lasting and better-looking nails.
| Type | Duration | Difficulty | DIY-Friendly |
|---|---|---|---|
| Gel | 2–3 weeks | Medium | Yes |
| Acrylic | 3–4 weeks | High | No |
| Regular Polish | 3–5 days | Easy | Yes |
"This was my first time doing a semi-permanent manicure at home and the results were better than expected. The polish lasted almost 3 weeks and looked professional!"
— Emma L.
"I love how shiny and durable my nails look with this technique. It’s a game-changer compared to regular polish!"
— Christina P.
"Easy to apply, looks amazing, and stays intact for days. I’ll never go back to basic polish again. Highly recommend!"
— Sophia M.
Whether you're just starting out or looking to level up your technique, we've got exactly what you need:

Subscribe to our newsletter and receive grooming tips, new arrivals, and exclusive offers straight to your inbox.
Only benefits. No nonsense.

Giannis – Owner of HairMania Greece & Founder of HairMaker.Gr
Professional hairstylist specializing in men’s & women’s care with 25 years of experience. Owner of HairMania Greece and founder of HairMaker.Gr.
Together with the HairMaker.Gr team, I publish articles based on real in-salon tests, client feedback, and daily hands-on experience.
Questions about hair or grooming? Email us at info@hairmaker.gr.
Follow us:
@hairmakergr | @hairmaniagr


Comments (0)